Build your own screenshot sharing application
November 10, 2023
UPDATE OCT 2024: Since writing this post I’ve moved my Database projects to using Turso in place of Xata and use Cloudflare for my CDN. The code examples and general flow in this post are still valid, but the db calls have changed.
There are several different ways to take and store screenshots on the web. The methods proscribed below are intermediate and advanced methods aimed at people who care about owning their content and want ways to slice and dice their history. My own progression of tooling took the following turns over the years.
- I started with a third-party mac application that I paid a monthly fee for. Eventually they raised prices and prevented exports. I vowed never to trust something so important to an outside service.
- I moved to Linux and had less options with off-the-shelf services. I decided uploading screenshots wasn’t a very hard problem and wrote some simple bash scripts to upload files to a Google Cloud Storage bucket. This is what I’d recommend for most people.
- My final solution (the museum) is a TypeScript based system that stores screenshots in a Xata database to make everything searchable. I run all files through Google’s Vision API for some enhanced abilities.
You don’t need to read this blog to find a third-party screenshot app, especially on a Mac. Most designers I know go with this first option and call it a day. We’ll instead spend time with options 2 and 3.
Set up a watch folder with bash scripting
A minimal setup only takes a weekend of tinkering and requires the following:
- A place to store your files ala Amazon S3 or Google Cloud Storage. My examples will use Google Cloud Storage.
- A domain that points to your public bucket and is public to the Internet.
- A piece of software like Flameshot, GNOME screenshot, or OBS to capture your screen.
- A small shell script that can watch a folder on your desktop and shuttle files to your bucket.
For many years before the museum I used a simple shell script that transported watched files on my local Desktop to a Google Storage bucket using their gsutil command-line tools. Internal Linux services inotify and notify-send helped give me an “app-like” experience with notifications and the provided a URL automatically copied to my clipboard. If you’re using S3 or another service, you can sub out rclone for the gsutil parts.
The URL can have whatever structure you want, but the below code will produce something like https://snid.es/2023OCT/d5RZnmlvWlioophL.png assuming you’ve set up your bucket for public access and attached a domain.
#!/bin/bash

# These are the folders on our machine we use to drop files to
IN=$HOME/davecloud/in/
OUT=$HOME/davecloud/out/

# Store your files in folders by date. For me I use "2023OCT" as a readable format
D=$(date +%Y%b)
DATEF=${D^^}/


# inotify is Linux's native service to watch for file changes
# notify-send is Linux's generic service to send noticiations
inotifywait -m -e create -e moved_to --format "%f" $IN \
  | while read FILENAME
    do
      echo Detected $FILENAME
      # Files saved across WSL seem to appear before they exist. A short sleep helps.
      if [ -n "$WSL_DISTRO_NAME" ]; then
        sleep 1
      fi

      # Generate a random id for our images. This gives us hard to guess urls
      MD5=$(openssl rand -base64 12 | tr -- '+=/' '-_~')
      RAND=($MD5.${FILENAME##*.})

      # Make an out directory if none exist
      if [ ! -d "${OUT}${DATEF}" ]; then
        eval mkdir "${OUT}${DATEF}"
        echo madking directory "${OUT}${DATEF}"
      fi

      # Move our files over to process them
      mv "${IN}${FILENAME}" "${OUT}${DATEF}${RAND}" || echo failed move
      echo attempting to move "${IN}${FILENAME}" TO "${OUT}${DATEF}${RAND}"

      # Use Google Cloud's gsutil program to shuttle them to my google storage bucket
      gsutil mv "${OUT}${DATEF}" gs://your-bucket-name/ || notify-send "Failure" --urgency=critical

      # Files saved across WSL seem to appear before they exist. A short sleep helps.
      if [ -n "$WSL_DISTRO_NAME" ]; then
        sleep 2
      fi
      rm -rf "${OUT}${DATEF}"

      # If we're on windows, use WSL's notifiy systems to manage notifications
      if [ -n "$WSL_DISTRO_NAME" ]; then
        echo "https://snid.es/$DATEF$RAND" | tr -d '\n' | clip.exe
        eval wsl-notify-send.exe --category "Uploaded" "https://snid.es/$DATEF$RAND" --urgency=normal
      else
        # My GNOME system runs wayland, so wl-copy is used
        echo "https://snid.es/$DATEF$RAND" | tr -d '\n' | wl-copy
        eval notify-send "Uploaded" "https://snid.es/$DATEF$RAND" --urgency=normal
      fi
    done
For testing, it’s easy enough to run this script from your terminal and watch the log as files move in and out. You’ll need to run chmod +x script.sh to make your script executable.
Run the bash script on startup in GNOME
Likely you want to run that script every time your computer starts. Setting this up is going to be different for every Desktop, but since I run GNOME, it’s as simple as making a new file named ~/.config/autostart/screenshots.desktop.
[Desktop Entry]
Name=Screenshots
GenericName=Script
Comment=Uploads files to gcloud through inotify
Exec=.config/scripts/watch.sh # Point to the location of your script
Terminal=false
Type=Application
X-GNOME-Autostart-enabled=true
Once that file is created, restart your user session and it should start running. If everything goes well, now you can save any file to your watch folder and a notification should pop up which its location in our Google bucket.
NNN plugin to quickly upload files
Because the script we set up watches for any files, not just screenshots, this means we can drop videos (or anything) in there as well. This partially removes my need for services like Dropbox, which I’d used primarily to transport files to others. I like using a watch folder vs working with the files directly because I can chain other programs to that concept fairly easily. For example, I use a small NNN plugin to automatically copy files to the watch folder, where they get shipped off. If you’ve never messed with NNN before, and you don’t understand why it’s cool, I made a video tutorial on the tool a few years ago.
#!/usr/bin/env sh

# Author: Dave Snider
# NNN plugin to copy files to my watch filder

if ! [ -z "$1" ] && [ -s "$1" ]; then
  cp "$1" $HOME/davecloud/in
  exit 2
else
  printf "empty file!"
fi

read -r _
This simple setup works great and is easy to manage. You don’t get a frontend like the one on this site, but not everyone needs that kind of depth. If you’re happy with this solution, you might not need to read further.
A more powerful solution using Google Cloud Vision APIs and Xata
While the above system worked reliably for many years it had a couple drawbacks. Because I was renaming all the files to use hashed strings, it was nearly impossible to distinguish one URL from another. If I lost that particular URL, I wasn’t going to dig through folders on Google Storage to find the file, and would instead resort to recapturing the content I wanted to share. This is the reason it often looks like there are duplicates in the museum.
What I really wanted was something searchable, and a way to visually navigate and delete old uploads in a protected fashion. This came with it’s own challenges:
- Image content is not searchable, so I’d need an OCR system to read the content and store that as meta information.
- I’d need a database to organize the files and store that metadata alongside.
- I’d also need a search mechanism like Elasticsearch to provide fuzzy search against the records.
- Lastly, for a frontend, I’d need a way to transform images on the fly to smaller sizes.
Xata, a Database platform where I happen to work, provides most of those features by default. Xata allows me to store the images in a database directly, then run image transformations on the fly. It also comes with a search and aggregations endpoint built on top of Elasticsearch so that I can build fun charts of my activity over the years. Because Xata is ultimately just a Postgres database, I can also add some other columns to manage the public visibility of certain files.
Once thing Xata does not provide is a way to read the text in my screenshots. I decided to utilize Google Vision AI for this part, primarily because I already had images on Google Storage, and because their API will process 1,000 images each month for free. In a good month I upload around 200 files, so I only needed to cover the cost of scanning my back catalog, which ended up being around $50 bucks. Using Google + Xata, this entire project can be run for free assuming normal use patterns.
Google Vision also provides services for auto-tagging and breaking down color properties in images. While the tagging service isn’t very useful for screenshots (lots of generic technology and software tags), it works extremely well at photography (check how it correctly spots hats). I additionally use the image properties API to determine what colors are most used in any particular image. Right now this is used to generate the ornamental color band component on individual image pages, but I have plans to provide search by color distance soon.
Everything Google gives me I store as simple JSON blobs in a Xata JSON column type. This makes them searchable through Xata’s native full-text search abilities and let’s me run direct filters on the JSON documents if I want to target a specific property.
The above flow likely sounds complicated, but it is all handled in a tidy 200-line TypeScript file. Both Xata and Google provide TypeScript clients so it made sense to move to that ecosystem for my new watch scripts rather than Bash. This means the code is also a little more portable and should run easily on Mac or Windows machines. Here’s the gist of what my new script does.
- Similar to my earlier shell script, I watch a single folder, this time using the Chokodar instead of iNotify.
- Files dropped there are shuffled up to my Google cloud bucket (now serving as a backup), this time using the
cryptopackage to generate the file names. - The file is then uploaded to Xata in a new
filestable of mydavesnider-dot-comdatabase. This creates a new record using the same ID that I used for Google. - I hit the Google Vision API to provide OCR text, tagging and color properties.
- I move the JSON blobs Google provides to the new Xata database record.
- I trigger a notification and copy the URL of the file to my clipboard.
Set up your project
First, make a new directory to store your script and install the dependencies. Make sure you sign up for a Xata account before beginning.
# Create a directory for your watch script
mkdir watch
cd watch

# Install Xata's CLI if you haven't already
pnpm add -g @xata.io/cli

# Auth Xata with its CLI
xata auth login

# Install the dependencies we'll need
pnpm add @google-cloud/stroage @google-cloud/vision @types/mime chokidar dotenv mime
When initializing a project, Xata allows us to start with a predefined schema. Here is the structure we’ll use, which gives us columns for all the Google Vision fields we’ll want to add as well as a way to hide and favorite certain images.
cd watch
xata init --schema /path/to/schema.json
You’ll need a .env file that points to all your secrets in the folder.
XATA_BRANCH=main
XATA_API_KEY=yourapikey
GOOGLE_PROJECT_ID=yourprojectid
GOOGLE_BUCKET_ID=yourbucketname
GOOGLE_KEY_FILE_LOCATION=/path/to/google-creds.json
For the Xata database, I use the following database schema. When creating a new Xata database you would initialize the database with the command xata init --schema /path/to/this/schema.json.
{
  "tables": [
    {
      "name": "files",
      "columns": [
        {
          "name": "file",
          "type": "file"
        },
        {
          "name": "googleURL",
          "type": "string"
        },
        {
          "name": "originalUploadDate",
          "type": "datetime"
        },
        {
          "name": "visionLabel",
          "type": "json"
        },
        {
          "name": "visionImageProperties",
          "type": "json"
        },
        {
          "name": "dominantColor",
          "type": "string"
        },
        {
          "name": "textContent",
          "type": "text"
        },
        {
          "name": "visionText",
          "type": "json"
        },
        {
          "name": "focusColor",
          "type": "string"
        },
        {
          "name": "fileTypeCategory",
          "type": "string",
          "notNull": true,
          "defaultValue": "unknown"
        },
        {
          "name": "isHidden",
          "type": "bool",
          "notNull": true,
          "defaultValue": "false"
        },
        {
          "name": "isFavorite",
          "type": "bool",
          "notNull": true,
          "defaultValue": "false"
        }
      ]
    }
  ]
}
Create a watch script in TypeScript
I use a single TypeScript file to watch for files, upload and scan them with Google Vision. Create a new node project with the following dependencies.
import * as chokidar from 'chokidar';
import { Storage } from '@google-cloud/storage';
import { ImageAnnotatorClient } from '@google-cloud/vision';
import * as fs from 'fs';
import * as crypto from 'crypto';
import * as path from 'path';
import * as mime from 'mime';
import { FilesRecord, XataClient } from './xata';
import { exec } from 'child_process';
import * as dotenv from 'dotenv';
dotenv.config({ path: path.resolve(__dirname, '.env') });

// This script assume you have a sibling `.env` file with the variables defined earlier

process.on('unhandledRejection', (reason, promise) => {
  console.error('Unhandled Rejection at:', promise, 'reason:', reason);
});

const fileTimeouts: { [key: string]: NodeJS.Timeout } = {};
const bucketName = 'cloudsite';
// An .env file alongside this repo stores my key
const xata = new XataClient({ apiKey: process.env.XATA_API_KEY, branch: 'main' });

// Watch for new files
// CHANGE THIS FOLDER LOCATION, I'VE HARDCODED IT
const watcher = chokidar.watch(process.env.HOME + '/davecloud/in', {
  persistent: true
});

// GCP Storage for backups
const storage = new Storage({
  // Google provides this crendentials in the form of a JSON file
  keyFilename: process.env.GOOGLE_KEY_FILE_LOCATION,
  projectId: 'my-google-bucket'
});

// GCP Vision API
const visionClient = new ImageAnnotatorClient({
  keyFilename: process.env.GOOGLE_KEY_FILE_LOCATION,
  projectId: 'my-google-bucket'
});

// Add and change events are debounced to avoid processing incomplete files
watcher
  .on('add', (filePath: string) => {
    scheduleProcessing(filePath);
  })
  .on('change', (filePath: string) => {
    if (fileTimeouts[filePath]) {
      clearTimeout(fileTimeouts[filePath]);
    }
    scheduleProcessing(filePath);
  });

// Check for files every 100ms
function scheduleProcessing(filePath: string) {
  fileTimeouts[filePath] = setTimeout(() => {
    processFile(filePath);
    delete fileTimeouts[filePath];
  }, 100);
}

// Files are processed by uploading to GCS, creating a record in Xata, and sending a notification
async function processFile(filePath: string) {
  try {
    const fileName = path.basename(filePath);
    const date = new Date();
    const formattedDate = `${date.getFullYear()}${date.toLocaleString('en', { month: 'short' }).toUpperCase()}/`;
    const randomString = crypto
      .randomBytes(12)
      .toString('base64')
      .replace(/[+=/]/g, (char) => {
        switch (char) {
          case '+':
            return '-';
          case '=':
            return '_';
          case '/':
            return '~';
          default:
            return char;
        }
      });
    const destinationFileName = `${formattedDate}${randomString}.${fileName.split('.').pop()}`;

    // Determine the content type of the file
    const contentType = mime.getType(filePath) || 'application/octet-stream';

    // Upload to Google Cloud Storage
    await storage.bucket(bucketName).upload(filePath, {
      destination: destinationFileName,
      metadata: {
        contentType: contentType
      }
    });
    console.log(`File uploaded to GCS: ${destinationFileName}`);

    // Upload to Xata
    const fileMetadata = {
      name: destinationFileName,
      contentType: contentType // Set the actual content type
    };

    const xataRecord = await createRecordInXata(fileMetadata, filePath, randomString);
    console.log(`Record created in Xata with ID: ${xataRecord.id}`);

    // Send notification
    const fileExtension = fileName.split('.').pop() || '';
    const url = `https://snid.es/${formattedDate}${randomString}`;
    sendNotification(url, fileExtension);

    console.log('About to call Vision API for:', `gs://${bucketName}/${destinationFileName}`);

    // Call Vision API if it's an image
    if (fileMetadata.contentType?.startsWith('image/')) {
      await callVisionAPI(xataRecord, destinationFileName);
    }

    // Delete local file
    fs.unlinkSync(filePath);
    console.log(`Local file deleted: ${filePath}`);
  } catch (error) {
    console.error('ERROR:', error);
  }
}

// Process the image with the Google Vision APIs
async function callVisionAPI(xataRecord: FilesRecord, destinationFileName: string) {
  try {
    const [result] = await visionClient.annotateImage({
      image: { source: { imageUri: `gs://${bucketName}/${destinationFileName}` } },
      features: [{ type: 'LABEL_DETECTION' }, { type: 'TEXT_DETECTION' }, { type: 'IMAGE_PROPERTIES' }]
    });

    let dominantColor = null;
    let focusColor = null;
    if (
      result.imagePropertiesAnnotation &&
      result.imagePropertiesAnnotation.dominantColors &&
      result.imagePropertiesAnnotation.dominantColors.colors
    ) {
      const colors = result.imagePropertiesAnnotation.dominantColors.colors;
      // Sort the colors based on their score to find the most dominant color
      const dominantColorObject = colors.sort((a, b) => (b.pixelFraction || 0) - (a.pixelFraction || 0))[0];
      const focusColorObject = colors.sort((a, b) => (b.score || 0) - (a.score || 0))[0];
      focusColor = rgbToHex(
        focusColorObject.color?.red || 0,
        focusColorObject.color?.green || 0,
        focusColorObject.color?.blue || 0
      );
      dominantColor = rgbToHex(
        dominantColorObject.color?.red || 0,
        dominantColorObject.color?.green || 0,
        dominantColorObject.color?.blue || 0
      );
    }

    const visionData: any = {};

    if (result.labelAnnotations) {
      visionData.visionLabel = result.labelAnnotations;
    }

    if (result.textAnnotations && result.textAnnotations[0]) {
      visionData.visionText = result.textAnnotations;
      visionData.textContent = result.textAnnotations[0].description;
    }

    if (result.imagePropertiesAnnotation) {
      visionData.visionImageProperties = result.imagePropertiesAnnotation;
      if (dominantColor) {
        visionData.dominantColor = dominantColor;
      }
      if (focusColor) {
        visionData.focusColor = focusColor;
      }
    }

    // Update the Xata record with the vision data
    if (Object.keys(visionData).length > 0) {
      await xata.db.files.update(xataRecord.id, visionData);
      console.log(`Record updated in Xata with vision data for ID: ${xataRecord.id}`);
    }
  } catch (err: any) {
    console.error('Error from Vision API:', err);
    if (err.details) {
      console.error('Error details:', err.details);
    }
    if (!err.stack) {
      console.error('The error object does not have a stack trace.');
    }
  }
}

// Create a record in Xata
async function createRecordInXata(fileMetadata: any, filePath: string, id: string) {
  const fileTypeCategory = fileMetadata.contentType?.split('/')[0];
  const record = await xata.db.files.create({
    googleURL: fileMetadata.name,
    id: id,
    originalUploadDate: new Date(),
    fileTypeCategory
  });

  // Read the local file
  const fileContents = fs.readFileSync(filePath);
  const fileBlob = new Blob([fileContents]);
  // Upload it to Xata using their binary upload method
  // This is needed because many of my files are large
  await xata.files.upload({ table: 'files', column: 'file', record: record.id }, fileBlob);
  await xata.db.files.update(record.id, { file: { mediaType: fileMetadata.contentType } });
  return record;
}

// Notifications work differently on WSL vs. Linux
function sendNotification(url: string, fileExtension: string) {
  const completeUrl = `${url}.${fileExtension}`;
  const isWSL = process.env.WSL_DISTRO_NAME !== undefined;
  const notificationCommand = isWSL
    ? `echo "${completeUrl}" | tr -d '\n' | clip.exe && wsl-notify-send.exe --category "Uploaded" "${completeUrl}" --urgency=normal`
    : `echo "${completeUrl}" | tr -d '\n' | wl-copy && notify-send "Uploaded" "${completeUrl}" --urgency=normal`;

  exec(notificationCommand, (error, stdout, stderr) => {
    if (error) {
      console.error(`Error sending notification: ${error}`);
      return;
    }
    console.log(`Notification sent: ${completeUrl}`);
  });
}

// Convert RGB to hex
function rgbToHex(r: number, g: number, b: number) {
  return '#' + ((1 << 24) + (r << 16) + (g << 8) + b).toString(16).slice(1).toUpperCase();
}
Run the TypeScript file on startup in GNOME
Similar to our bash solution, we’ll need to add an autostart script to GNOME so that our watch folder runs on startup. Because TypeScript is natively pretty difficult to run on it’s own, we need to make a small wrapper script in bash so that the service runs with all the dependencies.
#!/bin/bash

# Change these to the directory where your TypeScript project lives
cd /home/snide/code/watch/
/home/snide/.local/share/pnpm/pnpm run start ~/code/watch/index.ts > ~/watch.log 2>&1
Then we need to point to this file in GNOME’s autostart system. Create a new file in ~/.config/autostart/screenshots.desktop.
[Desktop Entry]
Name=Screenshots
GenericName=Script
Comment=Uploads files to gcloud through inotify
Exec=.config/scripts/watch.sh # Point to the location of your script
Terminal=false
Type=Application
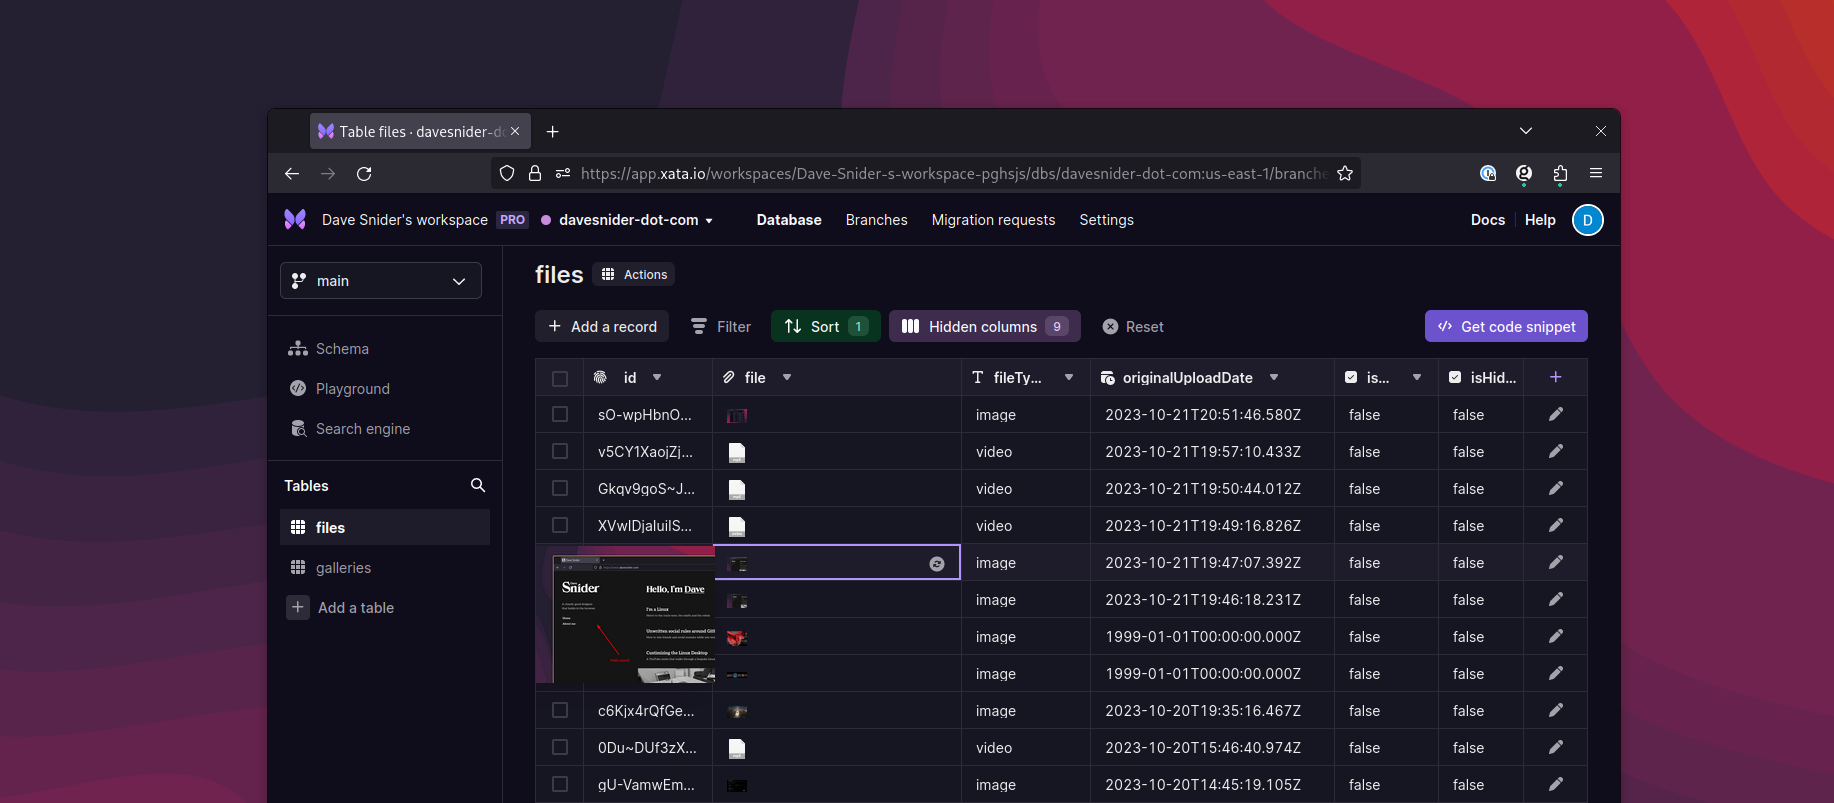
X-GNOME-Autostart-enabled=trueOnce that file is created, restart your user session and it should start running. If everything goes well, now you can save any file to your watch folder and a notification should pop up. The files will now exist in Google Storage (as a Backup) and Xata (as our primary Database). At this point we have everything we need to build a nice frontend to view the files. Here’s what everything looks like in its final form.
Building a frontend to view files
The source code for the museum is available on Github if you want. Going in depth on how to build out a JavaScript frontend would likely involve a much longer writeup but I’ll summarize briefly how my own Museum code works. Svelte does most of the heavy lifting, querying the Xata database. At a high-level view of the code, here is how easy Xata makes it to work with our database in any JavaScript system.
// To get files out of the db
const fileRecords = await xata.db.files.getPaginated({ pagination: { size: 10}});

// TO search for files by a keyword
const fileRecords = await xata.db.files.search('my search term', {
  // Target the text columns with our Google Vision content
  target: ['textContent', 'visionLabel']
  fuzziness: 1,
  page: {
    size: 10
  }
})

// To aggregate the number of screenshots uploaded per month
// This is how the bar chart histogram is built
const xataAgg = await xata.db.files.aggregate(
  {
    byDate: {
      dateHistogram: {
        column: 'originalUploadDate',
        calendarInterval: 'month'
      }
    }
  },
);

// Transform any of the images on the fly
const record = await xata.db.files.read('record_id');

const { url } = record.file.transform({
  height: 100,
  rotate: 180,
  format: 'webp'
});
This is just the tip of the iceberg of things we can do now that our files are in the database. To see the full flow in action, the video I posted along with my museum blog post covers the highlights.